Pages

Thursday, January 21, 2016

Teaching Reflective Narratives

Okay, please tell me I'm not the only one digging blindly for information on teaching Reflective Narratives to third graders.  This is our first year to take the ACT Aspire test which requires third graders to produce a thoughtful reflective narrative in thirty minutes - typed!  Oh my goodness.  If your third graders are like mine, it's all I can do to get them to write complete sentences with capital letters and correct punctuation!

Seriously, it's not all bad, but I am under some stress as I combed through TpT and every teacher blog I love and couldn't find a resource that met my needs.  There are TONS of resources on writing a Personal Narrative, which is just like a Reflective Narrative, just with no reflective requirement.  The problem is that if students don't choose a topic for their reflective narrative that begs to be reflected upon, they are in big trouble at the end.

The other problem was that many of the personal narrative units were written over the course of four to six weeks.  Since this process will have to be whittled down to 30 minutes, I can't start with six weeks.  I need to get it down (at least the first one) to no more than two weeks.

Lastly, the majority of the resources for a reflective narrative were written for middle and high school students (go figure).  Reflection is a tough process to teach to kids this age!   I decided to combine the best of all of the resources I was collecting, correlate everything to my Common Core standards, pare it down, and create a document that my third graders could actually understand.  Here's what I came up with.

Click on the image to see the product in my TpT store.
Here's how I used the document in my classroom.

1.  The first day we discussed what a personal narrative was.  We completed a Patricia Polacco study in November, so I brought back out When Lightning Comes in a Jar.  It's the perfect example of a reflective narrative because the story itself stops about six pages before the end of the book.  As we reviewed the story, I said ".,. and so at the end, Tricia sat on the porch with her grandma and enjoyed the fire flies in the jar."  Everyone nodded yes with a content smile.  Then I started turning more pages... "then what's all THIS???"  Kids were puzzled and looked around like, "Who added pages to that book??"  I told them that this is a REFLECTIVE ENDING.  I read the last few pages where Patricia Polacco reflects on the family reunion and how it serves as a way for her family to stay connected and pass down traditions through the generations.  "Is that part of the STORY? or is she REFLECTING BACK on the story?"  They could tell the difference.  We made an anchor chart of characteristics of a Reflective Narrative that we go back to throughout the unit to evaluate other stories and THEIR stories to make sure they fit the purpose for which we are writing.

2.  The next day, I used a model reflective narrative (included in the resource above) which demonstrated more of what their reflective narratives would look like.  (We can't all be Patricia Polacco - can I get an Amen?)  Using a model really helped my kids SEE each step of the writing process.  First, we evaluated the  model to be sure it was a reflective narrative based on our anchor chart.

3.  We then went through each step of the document.  When we dug into the prompt, I demonstrated first with the model.  When we were going to write the introduction/hook, we color coded the hook in the model.  When we started the plan, we looked at B, M, E and color coded them in the model.  And so forth.  When the students finished their draft, they went back and color coded their drafts for each part of the reflective narrative.  If they were missing something, they added it in the revision step.

4.  We then finished off the narrative by revising, editing, and publishing.  Next week we will be typing our narratives into KidBlog to practice our keyboarding skills.  I'll post more about that later.

If you have Third Graders who will be taking the ACT Aspire this Spring, let me know your ideas for teaching Reflective Narrative!

Tuesday, July 7, 2015

Vocabulary Instruction that WORKS!

Is it just me, or does everyone's test scores come back with "Vocabulary" as one of the lowest categories?  It seems like every professional development meeting I attend starts out with some expert with his/her hands in the air wondering what we are going to do about vocabulary instruction. My school is no different.  We have been scratching our heads for several years trying to figure out an effective way of teaching vocabulary.  I think I stumbled across something many years ago that, dare I say it, WORKS for teaching students new words - and it STICKS!

These strategies came from a book called Bringing Words to Life.  These are definitely not new strategies for teaching vocabulary, but I'm here to tell you, as a teacher who has been looking and digging... this way of teaching works.  I've seen it with my own eyes across seven years of teaching.  It just works.  Let me explain how it looks in our classroom.

After I have planned what books I will be reading each week, I look in each one for a word of which most kids probably won't know a PRECISE definition.  They may know generally what it means, but can't really nail it down.  It must be a word - and this is important - that they are very likely to encounter AGAIN in books they are reading at grade-level.  In Bringing Words to Life, this type of word is called a Tier 2 word.  Tier 1 words are words that students will come to your class knowing.  They are words that they hear and see on a regular basis (happy, jump, rock, etc.).  Tier 3 words are usually "domain specific" and although students may see them at grade-level, they are used in very specific contexts (peninsula, isotope, etc.).  As you can see, teaching Tier 2 words gives teachers the most "bang for their buck."  Students are most likely to transfer learning and use the instruction in their every day reading.

It doesn't take long to find these words easily.  I can look through high quality picture books or a chapter and find Tier 2 words within minutes.  Sometimes the challenge is choosing which of the many to teach.  My goal is to teach one per day.  Don't be intimidated by having to choose the words. After one or two books, you'll be a pro!

Once I've chosen the word for the day, I put it through a sequence based on Bringing Words to Life. I keep these sequences/plans in page protectors and organize them by book title in a three-ring binder. Whenever I am reading a book, I can find my Tier 2 Vocabulary plan quickly and easily.  You can grab my Vocabulary Plan as a FREEBIE from my TpT store HERE.  These are the seven steps I use:

1. Say the word.
2. Read the word in context.
3. Students say the word.
4. Give a student-friendly definition. (Usually from kids.wordsmyth.net.)
5. Give examples of the word in real-world contexts.
6. Engage students.
7. Students say the word.

Step #6 is fun!  It's important to find quick ways for the students to engage with the word.  Here are some ideas:

1. Thumbs Up / Thumbs Down - Give students real-life situations and ask them if the word would fit in that situation.  If it would, give a thumbs up.  If it wouldn't give a thumbs down.  With a quick glance around the room, you can see who has a handle on the word and who doesn't.

2. Ask Questions - If you are bored, would you sigh or giggle?

3.  Give Reasons - Why would you sigh?

4.  Word Associations - What other words are like sigh?  Why are they alike?

5. Dramatization - What does a sigh sound like?

6.  Personal Connection - Have you ever sighed?  When and why?

There are lots of ideas to choose from.  The goal is just to get the kids thinking about the word in ways THEY understand.

After I've made my plan, I write the word and the student-friendly definition on an index card.  I also usually photocopy the cover of the book or a picture in the book related to the word and attach it to the index card to help the kids remember the word in context.  After I'm finished with the card, it goes in the page protector behind the lesson plan so I can find it again next year!

When I'm ready to teach the word, I complete my read-aloud and say, "As I was reading today, I noticed a great word that is worthy of being a Buzz Word!"  (My room is bee-themed, but you can call your vocabulary words by any catchy name.)  This is when the kids all start guessing.  I love that they are tuning into rich vocabulary, even while I'm reading.  I'll hear them whisper, "Oh, I bet THAT's going to be our Buzz Word today!"  I then read the word in context, and they all usually shout out the word.  I quickly go through the vocabulary sequence in my plan, then I staple the index card to our Buzz Words bulletin board.
Our Buzz Words wall.  You can see the stickies with the students' names on them by the words.
Here's the amazing part.  Near the bulletin board, I keep a tiny stickie note pad and some pens.  I tell students that if they EVER see the word in ANY book they are reading, they can write their name and the page number where they see the word on one of the stickie notes and stick them next to the index card.  No rewards, no pieces of candy, nothing.  I know you're not going to believe this, but they dive in.  Seriously, they will not leave you alone about seeing these words!  It's awesome.  And every conversation is just reinforcement after reinforcement.

When our wall gets full, I usually give a Buzz Words quiz.  Of course, I give the students a word bank because I'm only grading them on whether or not they understand what the word means - not how to spell it.  (Most words are way beyond their spelling abilities.)  This year, instead of quizzes, I'd like to assess students by documenting whether or not they USE the Buzz Words in their writing.  I'm brainstorming ways I can keep up with that and "reward" students - maybe bonus points or names on stars next to the word?  Not sure yet.  Do you have ideas for encouraging students to use vocabulary words in their writing.  Please share!  I'd love to hear from you!

Friday, June 5, 2015

How I Use AR in the Classroom

I love Accelerated Reader as an incentive program for rewarding reading in the classroom.  It’s so nice to have a program that keeps up with book levels and rewarding students with points for UNDERSTANDING the story well enough to answer comprehension questions.  Our school offers a “Point Store” to students where they can “buy” little toys with their points, but this only happens about once a quarter.  I noticed that the Point Store rewards were not immediate enough to be an incentive to my resistant readers, so I looked and looked for a classroom reward system that would be hands-off for me and short-term enough to motivate my kids.

In order for the students to take ownership, I knew it would have to be on a bulletin board.  My only concern was posting and rewarding a “number of points.”  You and I both know as teachers that one student reading 10 points takes just as much, or more, effort than another student reading 30 points.  I really wanted to reward effort and progress, not point totals.  I always allow Renaissance Learning to generate the points goals for my kids, since their company bases the goals on years of compiled research (a little more scientific than my method... ahem...), which means they have goals based on their STAR score.  So, I came up with the idea to reward progress toward their goal in the form of PERCENTAGES.  I made a bulletin board with pockets and incentives for each 10 percentage point jump toward their goals.  A student who is half way to his goal of 30 points and a student who is half way to his goal of 15 points are both in the same pocket getting the same reward.  Yay!
Our AR Rewards Bulletin Board
Students are required to check their progress, move their sticks, and put the reward cards in a bucket on my desk – no card, no reward.  On Fridays, I print off the Goal Report from Renaissance Learning and compare it to the week before.  I record a check on this week's Goal Report for the goal card(s) they turned in.  Looking at last week's report keeps my "clever kids" from trying to get a reward twice. You know the ones.  ;)  Any cards they COULD have gotten (if it were in the bucket) I record with a star and remind them to move their stick so they don't miss out.  When I announce and distribute the rewards, the kids are so excited and proud!  It only takes about 5 minutes and is a great weekly reminder of the importance of reading on a regular basis.

Incentive Ideas
So, the big question... what do I use as incentives and not go broke?  There are an abundance of great ideas on the web.  We teachers are all in the same boat when it comes to bribing (excuse me...) rewarding our kids with little to no funds.  I’ll give you the list I use, but there are tons of ideas out there.  Just mix and match what works best for you.

10% Reading Club – book mark (Oriental Trading)

20% Reading Club – bubble gum

30% Reading Club – pencil (Oriental Trading)

40% Reading Club – piece of candy (from my kids’ last holiday stash usually  J)

50% Reading Club – choice of Book Nook (We have certain places to read around my room during Read to Self or Independent Reading time.  Some places are more comfortable/desirable than others.  This card allows a student to have first pick.)

60% Reading Club – sit in a rolly chair for the day (I have two rolly chairs for the two computers in my room.  Students get to replace their chairs with one of these.  It’s just plain fun!)

70% Reading Club – popsicles  (Because I don’t have access to a freezer in my room and don’t want to hand out popsicles every Friday, I usually give this one away the day before the AR party to allow everyone a chance to reach this goal.  Then we have one day that all of the popsicles are handed out to the students who have made it to this level.)

80% Reading Club – FREE Pizza – Through Pizza Hut’s Book It program, a student who makes it to 80% gets a free personal pan pizza coupon.  It’s a free program.  Sign up today! 

90% Reading Club – Brag Tag – It’s pretty amazing how cheaply you can purchase personalized brag tags.  I bought mine from School Life, but there are several companies out there.  A picture of mine is on the reward card if you want an example.

100% Reading Club – AR Party – We reserve one day at the end of each grading period to throw a party for students who reached their goal.  We try to make the day special with ice cream sundaes or popcorn and a movie... something the students would really enjoy.  Students who don’t reach their goal are NOT PUNISHED.  They have a regular school day, with extra time for reading and taking tests so they can get a jump on their goal for the next grading period.

This reward program has been a real game-changer in my classroom.  My two lowest readers BOTH made their AR goal for the FIRST time this last grading period.  After tons of encouragement, they took ownership of their goal!  I can’t explain the look on their faces when they came forward to classroom applause to accept their 100% Reading Club card a few Fridays ago.  They were so proud of themselves, because they knew they had accomplished this goal on their own.
    
My reward cards are on TPT if you’re interested.  They are formatted for Avery business cards, but at this point in the year, I print them off on card stock and cut them on the paper cutter.  (I’m telling you, times are tough...  J)  I’ve kept them editable so you can change the incentive if you find one that works better for your classroom. I hope this gives you some ideas on how to use AR to reward reading in your classroom!  Let me know how you use AR in your classroom by posting a comment below.

Sunday, March 29, 2015

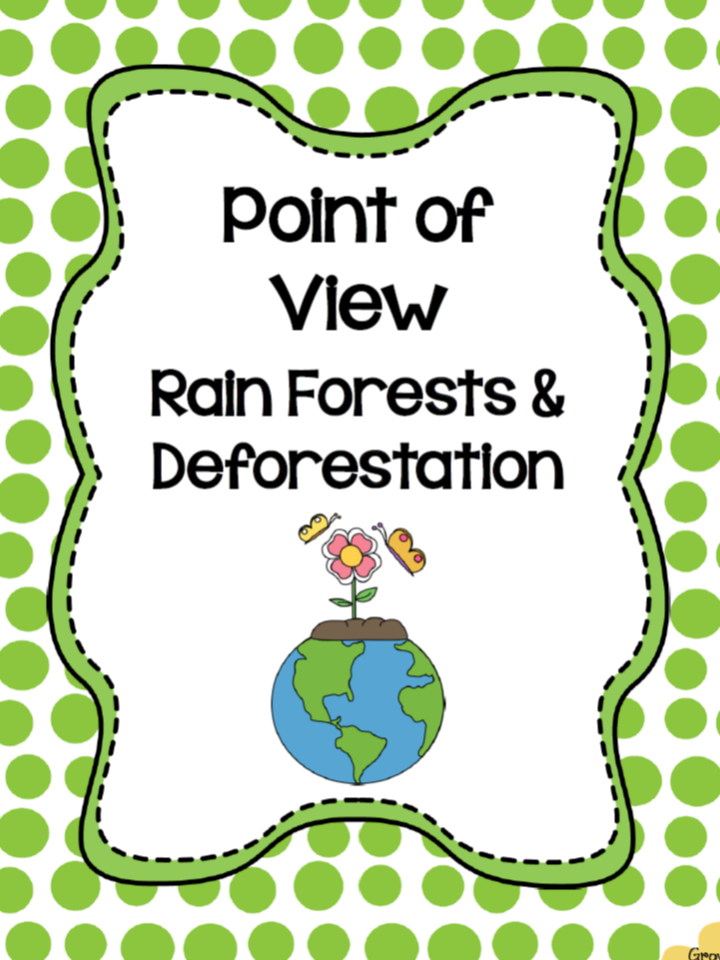
Rainforest: Point of View

It's spring!  Time to think about pretty weather and fun spring units!  One unit that lends itself to so many great reading strategies is The Rain Forest.  Who doesn't love to read about warm, sunny places with tons of interesting plants and animals?!  You can go SO many different directions with this topic! I know one of the most popular activities is for the students to do animal research papers. Since our second graders did animal research projects last year, I really wanted to spice things up and go a different route this year.

My students and I had been having fun with Point of View in fiction (which I will talk about in another blog), but we hadn't really talked much about it in a non-fiction context.  I was a little nervous because to teach Point of View in non-fiction, since I would have to find a somewhat "controversial" topic... insert visions of phone calls from upset parents... so, what to do for a toned-down, high-interest topic.  Enter, The Rain Forest.  Now, I know what you're thinking.  What two sides can you actually take with the rain forest: don't cut it down and cut it down?  No, actually, when I taught World Geography in high school and studied the rain forest in more depth, I learned that there are MANY voices in the rain forest debate.  It's much more multi-faceted than young students are led to believe.  So, I decided to experiment and see if my third graders would be able to see other points of view related to the rain forest issue, besides the obvious one.  In the meantime, we would practice our non-fiction reading strategies, present what we learned, and become informed on this important topic.

We started with a trusty KWL chart.  You'd be surprised at how much kids already know about rain forests!  After activating our prior knowledge,  we read a short chapter book that introduced the students to the basics of rain forests.  This way I knew we were all on the same page. I had already taught the basic non-fiction reading strategies (graphic/text features, text structure, main idea/details, etc.), so reading the chapter book together gave everyone a chance to practice these strategies in context. We read Secrets of the Rain Forest, by Edward Myers, which is part of our Good Habits Great Readers series.  
Click the picture to be taken to more information about this book.
Of course, this not the only book good for this purpose.  I just ordered a class set of the Magic Tree House non-fiction companion to Afternoon on the Amazon called Rain Forests.  Its a GREAT book that would accomplish the same purpose.
After reading the chapter book, I had students summarize their learning in a Rain Forest Brochure that you can get from my TpT store.  These were great to show off at Parent Teacher Conference!
Click above to go to my TpT store.
Of course, the last chapters of these books focus on the problem of deforestation.  Once I convinced the students that there might be a reason for cutting down a tree or two,  I split them into four groups - one at each table.  Each group was then responsible for reading, understanding, and discussing an interest group's point of view on deforestation.  I chose only four to keep it simple: Environmentalists, Native Amazonians, Ranchers, and Government Leaders.  (The posters I used, which are written in first person, are available in my TpT store.  I laminated one set and made a copies for each student to record their thoughts.)
Click above to go to my TpT store.
After 10 minutes, I had the groups rotate tables until all four groups had a chance to read each poster. I heard great discussions at each table!  The kids, especially my "little rebels," loved being the devil's advocate when other students demanded that every tree be saved.  "What about jobs for the people of Brazil?" they would say.  LOVE it!  :)

At the end of the unit, we wrote an Opinion Paper on OUR point of view on deforestation using information from the posters and the books we read.  I'm happy to report I still have a class full of aspiring tree-huggers, but now I think they own their opinion.  They understand why they believe what they believe and appreciate the complexity of our world's problems a little more than they did when we started.  Mission accomplished!

Let me know if you try this activity with your students. I'd love to hear how your kiddos responded!

Sunday, March 22, 2015

Spring Break

Who else is doing the Spring Break happy dance!?  Woo Hoo!  We're having Spring Break this week, but because we went over on snow days, they added five days to the end of school... hello June. Anyway, I'm trying to enjoy these five days off even though I know I'm going to have to pay for it eventually.  In addition to finishing up PARCC testing this week, I also met my first student teacher, Mrs. Barger.  She's an absolute JOY to have in the classroom!  I kept trying to tell her that last week didn't look anything like a "normal" week in our classroom, but I can tell she's not buying it yet.  I'm feeling the pressure to be on my A-game when we get back from break!  ;)

After testing and before we left for Spring Break, we had two instructional days to fill with high-quality content.  Can someone say "feature-length film?"  I'm only kidding, of course.  But it's tough to come up with something productive to do two days before Spring Break.  To add to the pressure, I had a student teacher to impress!  ;)  Since I felt like I had at least introduced all of the CCSS for fiction and non-fiction, I decided to do a quick informal assessment of my kiddos to see how much they had retained up to this point.  If I saw holes as a class, then I would focus on those standards in my end-of-the-year units.

For my informational CCSS standards review, I picked up the Close Reading Passages for Spring FREEBIE from 24/7 Teacher on TpT.  This is a great review of almost all of the informational standards, and the passage is written at four different lexile levels perfect for third grade.  I paired it with the "Spring" Brain Pop Jr. video and had them include information from both on the constructed response page.

I ended up creating my own literature standards review activity.  I used a great little fable from FableVision called "Deep Spring" and wrote some simple questions that I'm attaching as a FREEBIE. After students completed these activities, I quickly reviewed their answers and assessed them as N-Novice, P-Proficient, and M-Master and put them on a chart so I can see how the class is doing as a whole.  It really didn't take as long as you may think, and I'm excited about using the information I gained to help me decide what standards to highlight in our last two units.
Click the link above to grab the FREEBIE from my TpT Store.
Planning between now and the end of the year can be sketchy with end-of-the-year assessments, parties, assemblies, field trips and so on.  I hope these quick review materials help you plan between now and the end of school! Here's to a great Spring Break!

Saturday, March 21, 2015

Welcome!

I'm so excited to enter into the blogging world!  I've been an avid teacher blog stalker for years now, and can't wait to join in the fun!  I have always loved getting and sharing ideas with my co-workers. I live in a rural community, so popping over to another elementary school or chatting at lunch with friends who teach at nearby schools isn't a possibility for me.  Since I absolutely love experimenting with new ideas in the classroom, blogging just seemed like the answer.